How to integrate Sendrealm with Supabase
Introduction
When it comes to sending transactional emails, using a reliable SMTP server is crucial. Sendrealm offers a robust solution for this, allowing you to easily integrate its SMTP credentials into your projects. In this guide, we'll walk you through the process of setting up Sendrealm SMTP credentials in your Supabase project. By the end of this tutorial, you'll be able to send emails using Sendrealm SMTP server directly from Supabase.
Step 1: Generate Your Sendrealm API Key
Before you can integrate Sendrealm SMTP into Supabase, you'll need to generate an API key from the Sendrealm dashboard.
- Log in to your Sendrealm account.
- Navigate to the API Keys page.
- Click on Create API Key.
- Copy the generated API key and keep it secure, as you'll need it later.
Tip: Make sure to store your API key securely and avoid sharing it publicly.
Step 2: Understanding Sendrealm SMTP Credentials
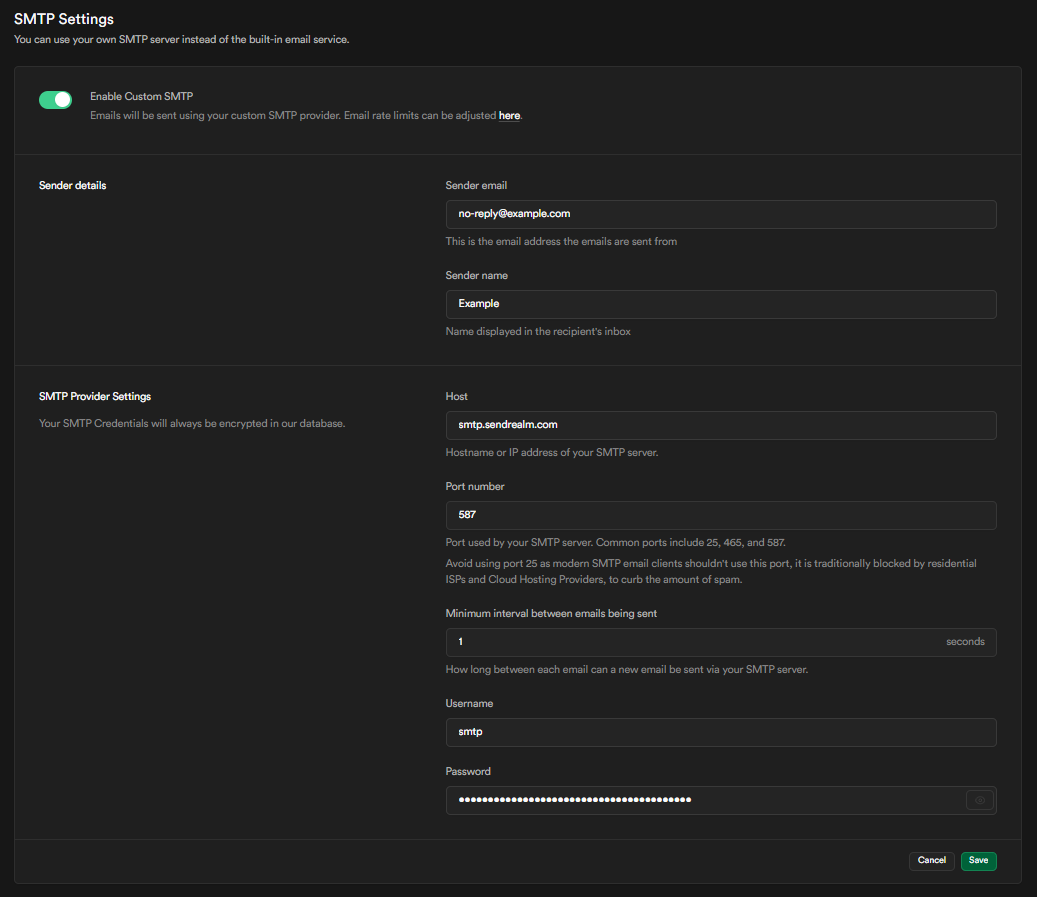
Once you have your API key, you can use the following SMTP credentials:
- Host: smtp.sendrealm.com
- Port: 587
- Username: smtp
- Password: {API_KEY} (Replace with your actual API key)
Step 3: Adding SMTP Credentials to Supabase
To integrate Sendrealm SMTP with your Supabase project, follow these steps:
-
Access Your Supabase Project Log in to your Supabase dashboard and open the project you want to configure.
-
Navigate to the Authentication Settings Under the "Authentication" section, select Settings. Here, you can configure the email settings that Supabase will use to send emails.
-
Configure SMTP Settings In the SMTP settings section, enter the following details:
-
SMTP Host: smtp.sendrealm.com
-
SMTP Port: 587
-
SMTP Username: smtp
-
SMTP Password: Enter the API key you generated earlier.
-
-
Save Your Configuration After entering all the necessary information, click on Save to apply your SMTP settings.
Step 4: Testing Your Setup
Once you've configured the SMTP settings in Supabase, it's essential to test your setup to ensure that emails are being sent correctly. You can do this by triggering an email from your Supabase project, such as a password reset or email verification.
Conclusion
Integrating Sendrealm SMTP credentials into your Supabase project is a simple yet powerful way to manage email sending. With just a few steps, you can ensure that your transactional emails are delivered reliably. If you encounter any issues or have questions, don't hesitate to reach out to Sendrealm support.